Scikit-Learn#

Random Forest#
Description#
Random forests or random decision forests are an ensemble learning method for classification, regression and other tasks that operates by constructing a multitude of decision trees at training time and outputting the class that is the mode of the classes (classification) or mean prediction (regression) of the individual trees.
Each tree of a random forest is trained on a randomised subset of the original training set.
How does that work#
At each node of a tree, the algo will test every split possible and keep the split which procures the most gain in information. For a split to be done, the algo will take one feature and one threshold and seperates the samples that have a value for this feature below or equal to the threshold from the samples that have a value above the threshold.
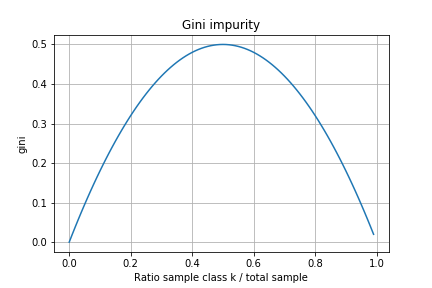
To measure the information gain several methods exist, one of those which is often used is the gini impurity score. The gini impurity of a node is calculated with the following formula:
with \(\rho_{k} = \frac{n_{k}}{n}\),
\(k\) = class {0, 1},
\(n\) = sample count,
\(\tau\) = node
The information gain of a split is then calculated like this:
First calculate the gini impurity of the two sub nodes. Then sum the two gini impurity weighted by the number of samples of the corresponding sub node like this:
For a classifier with only two classes, the gini impurity of a node follow this function:
Simple tree example:
![digraph Tree {
node [style="filled, rounded", color="black"] ;
edge [fontname=helvetica] ;
0 [label="τ 0\ngini = 0.5\nsamples = 100\nvalue = [50, 50]", fillcolor="#eef7fd"] ;
1 [label="τ left\ngini = 0.0\nsamples = 20\nvalue = [20, 0]", fillcolor="#eef7fd"] ;
0 -> 1 [labeldistance=2.5, labelangle=45, headlabel="True"] ;
2 [label="τ right\ngini = 0.46875\nsamples = 80\nvalue = [30, 50]", fillcolor="#eef7fd"] ;
0 -> 2 [labeldistance=2.5, labelangle=-45, headlabel="False"] ;
}](../../_images/graphviz-377d8fb3672673a99ff2d1435e234dbb7eb0ef6d.png)
How to use#
In Scikit-Learn the random forest classifier can be imported like this:
from sklearn.ensemble import RandomForestClassifier
Usage example:
from sklearn.datasets import make_classification
# Get dataset example with 1000 samples and 4 features
X, y = make_classification(n_samples=1000, n_features=4,
                           n_informative=2, n_redundant=0,
                           random_state=0, shuffle=False)
# Create a random forest model
randomForest = RandomForestClassifier(max_depth=2, n_estimators=100, criterion="gini" , random_state=0)
# Train the model with dataset
randomForest.fit(X, y)
# Print importances of features and predict new sample
print(randomForest.feature_importances_)
print(randomForest.predict([[0, 0, 0, 0]]))
This will produce the following outputs:
[0.14205973 0.76664038 0.0282433  0.06305659]
[1]
Grid Search#
If we want to test multiple combination of parameters when training the classifier we can use the following code. The grid search will train one model for each combination of parameter based on the given matrix and return the best model.
from sklearn.model_selection import GridSearchCV
# Create new random forest model
randomForest = RandomForestClassifier()
# Matrix of parameter to test
gridParams = {"criterion": ["gini"],
              "n_estimators": [100, 150, 200],
              "max_depth": [3,4,5,6],
              "bootstrap": [True],
              "max_features": [None]}
# Create new grid search
model = GridSearchCV(estimator=randomForest,
                     param_grid=gridParams,
                     n_jobs=-1,
                     cv=5,
                     verbose=10)

# Train the model
model.fit(X, y)

# Get the best estimator and the corresponding params
forest = model.best_estimator_
forest_param = model.best_params_
Accuracy Checking#
Checking the accuracy of the model using the train set:
from sklearn.metrics import accuracy_score

# Validate model
y_predict = model.predict(X)
result = accuracy_score(y.values, y_predict)
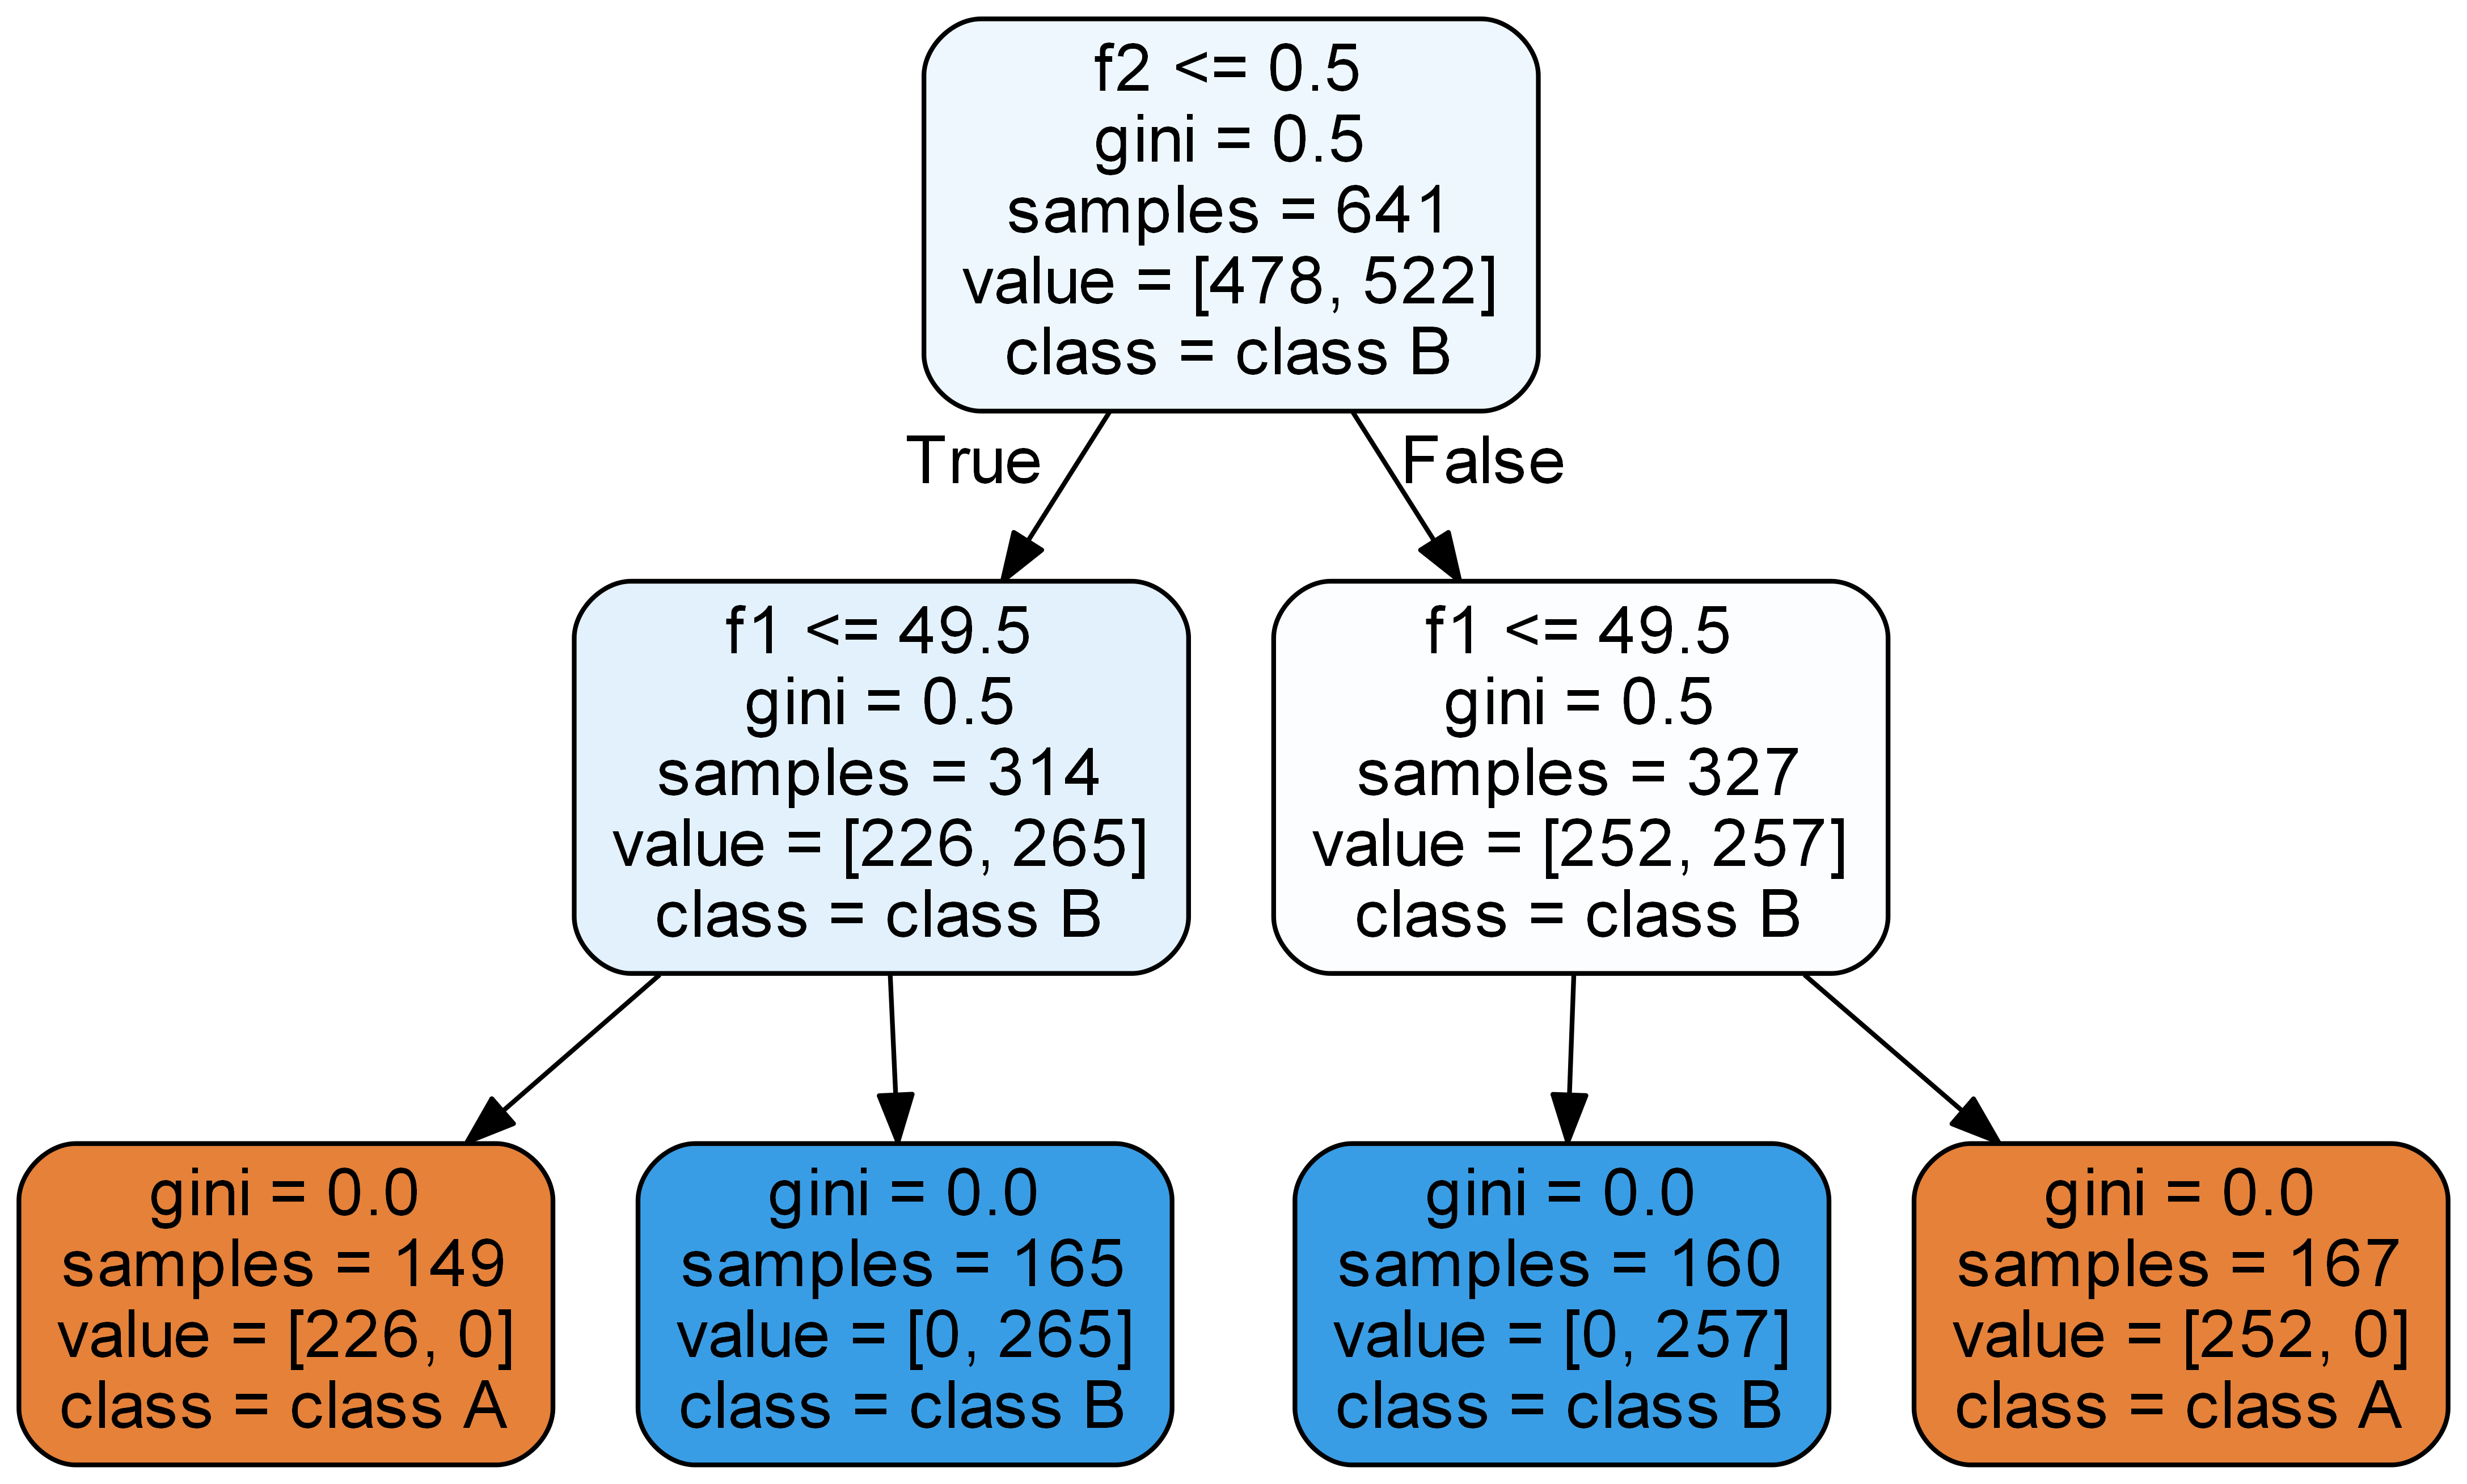
Trees Visualisation#
Visualising trees from random forest inside jupyter lab:
from sklearn.tree import export_graphviz
from IPython.display import Image

# Extract single tree
estimator = forest.estimators_[0]

# Export as dot file
export_graphviz(estimator, out_file='tree.dot'),
                feature_names=X.columns,
                class_names=["class A", "class B"],  # Need to pass list of class names
                rounded=True, proportion=False,
                precision=2, filled=True)

# Convert to png using system command (requires Graphviz)
call(['dot', '-Tpng', 'tree.dot', '-o', 'tree.png', '-Gdpi=600'])

# Display in jupyter lab
Image(filename='tree.png')